Honeywell T6 Pro Installation Manual PDF: A Comprehensive Guide
This detailed PDF guide simplifies your T6 Pro setup, offering clear instructions and visuals for a smooth installation experience. Access operating instructions easily!
Understanding the Honeywell T6 Pro Smart Thermostat
The Honeywell T6 Pro is a sophisticated, 7-day programmable smart thermostat designed for optimal home comfort and energy savings. It learns your heating and cooling preferences, automatically adjusting temperatures to suit your lifestyle.
Key features include a vibrant touchscreen display, remote control via the Honeywell Home app, and compatibility with popular smart home platforms like Amazon Alexa and Google Assistant.
This thermostat offers flexible scheduling options, geofencing capabilities, and detailed energy reports. The T6 Pro aims to provide a user-friendly experience while maximizing efficiency and reducing energy consumption. Understanding these core functionalities is crucial before beginning the installation process, ensuring a seamless integration into your home’s HVAC system.
What’s Included in the Box?
Upon opening your Honeywell T6 Pro package, you’ll find several essential components to facilitate a successful installation. These include the T6 Pro thermostat itself, featuring a detachable touchscreen display and a base plate for wall mounting.
You’ll also receive a screw kit containing the necessary hardware for secure attachment. A wire label kit is provided to help you accurately identify and label your existing HVAC wiring.
Crucially, the box contains a detailed installation guide – often a quick start guide and a referral to the comprehensive Honeywell T6 Pro Installation Manual PDF available online. Verify all components are present before proceeding to avoid delays during setup.
Safety Precautions Before Installation
Prioritizing safety is paramount before commencing any thermostat installation. Always disconnect power to your HVAC system at the breaker box to prevent electrical shock. Confirm the power is off with a non-contact voltage tester.
Carefully read the Honeywell T6 Pro Installation Manual PDF for specific warnings and cautions related to your system. If you are uncomfortable working with electrical wiring, consult a qualified HVAC professional.
Avoid installing the thermostat in direct sunlight or near sources of extreme heat or moisture. Ensure the mounting location is structurally sound and can support the thermostat’s weight. Proper safety measures protect you and your HVAC equipment.

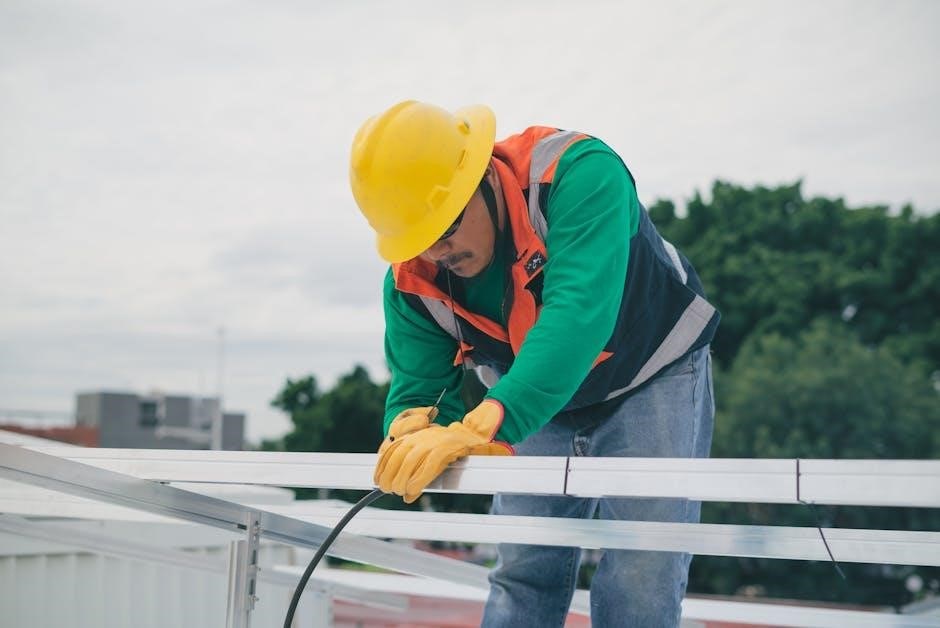
Installation Process: Step-by-Step
Follow this guide for a streamlined installation. It details powering down your HVAC, removing the old thermostat, wiring the T6 Pro, and mounting the baseplate.
Turning Off Power to Your HVAC System
Safety first! Before beginning any work with your Honeywell T6 Pro thermostat, absolutely disconnect power to your heating, ventilation, and air conditioning (HVAC) system. This crucial step prevents electrical shock and potential damage to your equipment.
Locate your circuit breaker panel, typically found in a basement, garage, or utility room. Identify the breaker that controls your HVAC system – it’s often labeled “Furnace” or “HVAC.” Completely switch the breaker to the “OFF” position.
To verify the power is off, use a non-contact voltage tester at the thermostat wires. If the tester doesn’t indicate voltage, you’re safe to proceed. Double-check before touching any wires! A disconnected power supply is paramount for a safe and successful installation.
Removing Your Old Thermostat
Carefully remove your existing thermostat. Begin by gently removing the thermostat cover – it usually snaps off or has small release tabs. Do not disconnect any wires yet! Take a clear photograph of the existing wiring configuration. This photo will be an invaluable reference during the Honeywell T6 Pro installation process, ensuring correct wire connections;
Once photographed, loosen the screws holding the thermostat base to the wall. Gently pull the base plate away from the wall, exposing the wires. As you pull, be mindful of any wires that might be tightly secured.
Label each wire with the corresponding terminal letter before disconnecting them. This prevents confusion later.
Identifying HVAC Wires & Compatibility
Accurate wire identification is crucial for successful installation. The Honeywell T6 Pro typically requires wires labeled R, C, W, Y, and G. ‘R’ is power, ‘C’ is common (often missing in older systems), ‘W’ controls heating, ‘Y’ controls cooling, and ‘G’ activates the fan.
Verify your HVAC system’s compatibility. Most 24V systems are compatible, but high-voltage systems require professional installation. Carefully compare your existing wiring to the T6 Pro wiring diagram.
If you encounter wires with different labels or colors, consult the Honeywell documentation or a qualified HVAC technician. Incorrect wiring can damage your system!
Common Wire Configurations (R, C, W, Y, G)
Understanding these wires is key. ‘R’ (Red) provides 24V power. ‘C’ (Common), often blue, completes the circuit – essential for consistent power. ‘W’ (White) activates heating; ‘Y’ (Yellow) controls cooling. ‘G’ (Green) operates the fan.
Typical setups include R and W for basic heating, or R, Y, and W for cooling. A full system uses R, C, W, Y, and G. Some systems may have multiple ‘R’ wires; these are usually bundled together.
Always double-check your existing thermostat’s wiring before disconnecting anything. Document the wire colors and terminal connections for easy reference during installation.
Dealing with a C-Wire (Common Wire) – Solutions & Alternatives
The Honeywell T6 Pro often requires a C-wire for reliable operation. If you lack one, several solutions exist. A C-wire adapter “borrows” power from other wires, offering a convenient fix. Alternatively, you can run a new wire, though this is more involved.
Some HVAC systems have a spare wire that can be repurposed as a C-wire at the furnace/air handler. Carefully consult your HVAC system’s documentation or a qualified technician before attempting this.
Using a C-wire adapter is generally simpler, but ensure compatibility with your system. Incorrect installation can cause issues, so follow the adapter’s instructions precisely.
Connecting the Wires to the T6 Pro Base Plate
Carefully match each wire to the corresponding terminal on the T6 Pro base plate. Refer to the wiring diagram in your installation manual – accurate connections are crucial. Typically, R connects to Rh/Rc, W to W, Y to Y, and G to G.
The C-wire, if present, connects to the C terminal. Ensure each wire is securely inserted into its terminal; a loose connection can cause malfunctions. Use a small screwdriver to tighten the screws, but avoid over-tightening.
Double-check all connections against your old thermostat’s wiring and the T6 Pro diagram before proceeding. Incorrect wiring can damage your HVAC system or the thermostat itself.
Mounting the T6 Pro Base Plate
Once the wires are securely connected, carefully position the T6 Pro base plate on the wall where your old thermostat was located. Use the provided screws and wall anchors to mount the base plate firmly. Ensure it’s level for a professional appearance and proper display alignment.
If you’re using wall anchors, drill pilot holes first to make installation easier and prevent damage to the wall; Tighten the screws until the base plate is snug against the wall, but avoid over-tightening, which could strip the screw holes.
Verify the base plate is stable and doesn’t wobble before attaching the thermostat display. A secure mount is essential for long-term reliability.

Configuring the Honeywell T6 Pro
Now, attach the display, power on, connect to your Wi-Fi network, and register your new thermostat for full access to smart features!
Attaching the Thermostat Display
Carefully align the Honeywell T6 Pro thermostat display with the mounted base plate. Ensure the connection pins are properly aligned before gently pressing the display onto the base. You should hear a distinct click, confirming a secure attachment.
Avoid forcing the display onto the base, as this could potentially damage the pins or the unit itself. If it doesn’t easily snap into place, double-check the alignment. Once attached, verify the display is firmly seated and doesn’t wobble.
A properly secured display is crucial for optimal functionality and a clean aesthetic. This step prepares the thermostat for powering on and completing the initial setup process, unlocking its smart features.
Powering On and Initial Setup
Restore power to your HVAC system at the breaker box. The Honeywell T6 Pro display should illuminate, initiating the startup sequence. Follow the on-screen prompts to begin the initial setup. You’ll be guided through selecting your language, date, and time settings.
The thermostat will then prompt you to identify your system type – furnace, heat pump, or boiler. Accurate selection is vital for correct operation. Next, you’ll configure basic preferences like temperature units (°F or °C).
Take your time during this process, ensuring each setting is correct. This initial setup lays the foundation for personalized comfort and efficient energy management with your new smart thermostat.
Connecting to Wi-Fi
To unlock the smart features of your Honeywell T6 Pro, connecting to Wi-Fi is essential. From the thermostat display, navigate to the settings menu and select “Wi-Fi.” The thermostat will scan for available networks in your area.
Choose your home network from the list and enter your password when prompted. Ensure you’re using a 2.4 GHz network, as the T6 Pro may not support 5 GHz. A successful connection will be indicated by a Wi-Fi symbol on the display.
This connection enables remote control via the Honeywell Home app, software updates, and integration with smart home assistants. Troubleshooting tips are available in the manual if connection fails.
Registering Your Thermostat
Registering your Honeywell T6 Pro unlocks full access to its features and support resources. Download the Honeywell Home app on your smartphone or tablet and create an account, or log in if you already have one.
Within the app, follow the on-screen instructions to add your thermostat. You’ll likely need to enter the thermostat’s serial number, found on the device itself or in the packaging. Registration links your thermostat to your Honeywell Home account;
This process allows for remote control, personalized scheduling, and access to exclusive features. It also simplifies warranty claims and provides access to dedicated customer support. Refer to the installation manual PDF for detailed steps.
Advanced Features & Settings
Explore smart functionalities like geofencing and custom scheduling within the Honeywell Home app, maximizing comfort and energy savings with your T6 Pro.
Scheduling & Geofencing
Leverage the power of automated comfort with the Honeywell T6 Pro’s scheduling capabilities. Create personalized heating and cooling schedules tailored to your daily routine, optimizing energy usage and ensuring a comfortable environment when you’re home.
Geofencing takes convenience a step further, automatically adjusting the temperature based on your location. As you approach or leave your home, the thermostat intelligently responds, pre-heating or cooling the space for your arrival or conserving energy while you’re away.
The Honeywell Home app provides intuitive controls for managing both schedules and geofencing settings. Easily customize time blocks, temperature preferences, and geofence radii to perfectly match your lifestyle. Enjoy a smarter, more efficient home climate control system!
Smart Home Integration (Amazon Alexa, Google Assistant)
Unlock voice control and seamless automation by integrating your Honeywell T6 Pro with popular smart home platforms like Amazon Alexa and Google Assistant. Simply link your Honeywell Home account to your preferred voice assistant for hands-free temperature adjustments.
Imagine saying, “Alexa, set the thermostat to 72 degrees,” or “Hey Google, what’s the temperature inside?” This integration offers unparalleled convenience and control over your home’s climate.
The Honeywell Home app guides you through the easy setup process, ensuring a smooth connection. Explore custom routines and scenes to create a truly connected home experience. Enjoy the benefits of a smarter, more responsive heating and cooling system!
Honeywell Home App Overview
The Honeywell Home app is your central hub for controlling and monitoring your T6 Pro thermostat. This intuitive app, available for iOS and Android, provides remote access to your home’s temperature from anywhere with an internet connection.
Effortlessly adjust schedules, create custom comfort settings, and view energy usage reports. The app’s user-friendly interface makes it easy to manage multiple thermostats and zones. Receive alerts for extreme temperatures or system malfunctions.
Explore advanced features like geofencing, which automatically adjusts the temperature based on your location. Download the app and unlock the full potential of your Honeywell T6 Pro!

Troubleshooting Common Issues
Resolve typical problems quickly! This section details solutions for power failures, Wi-Fi connectivity, inaccurate readings, and unresponsive HVAC systems.
Thermostat Not Powering On
If your Honeywell T6 Pro fails to power on, begin by verifying the power supply to your HVAC system is active. Check the circuit breaker dedicated to your heating and cooling equipment – a tripped breaker is a common culprit.
Next, carefully inspect the wiring connections at both the thermostat base plate and the HVAC unit itself. Ensure all wires are securely fastened to their respective terminals. A loose connection can interrupt the power flow.
Crucially, confirm the presence of a ‘C-wire’ (Common wire). The T6 Pro often requires a C-wire for consistent power. If absent, explore the alternative power solutions detailed in the manual, such as using a C-wire adapter.
Finally, double-check the thermostat display is correctly attached to the base plate. A faulty connection here can also prevent power-up.
Wi-Fi Connection Problems
Experiencing difficulty connecting your Honeywell T6 Pro to Wi-Fi? First, ensure your home network is functioning correctly and that you have the correct password. Double-check for typos during entry within the Honeywell Home app.
Verify the thermostat is within range of your Wi-Fi router. Walls and distance can significantly impact signal strength. Consider temporarily moving the router closer during the initial setup process.
The manual details troubleshooting steps, including restarting both your router and the T6 Pro. Also, confirm your router’s security settings are compatible – some older security protocols may cause connection issues.
If problems persist, consult the Honeywell Home app’s help section or the online support resources for specific error codes and solutions.
Incorrect Temperature Readings
Are you noticing inaccurate temperature readings on your Honeywell T6 Pro? Several factors can contribute to this issue. First, ensure the thermostat isn’t directly exposed to sunlight, drafts, or heat-generating appliances. These external influences can skew the sensor’s accuracy.
The installation manual PDF highlights the importance of proper placement. Verify the thermostat is mounted on an interior wall, away from windows and vents. Calibration options within the Honeywell Home app allow for minor adjustments to compensate for slight discrepancies.
If the readings remain consistently off, a reset to factory defaults (detailed in the manual) might resolve the problem. Check for any obstructions blocking airflow around the thermostat.
HVAC System Not Responding
If your Honeywell T6 Pro isn’t controlling your heating or cooling system, consult the installation manual PDF for troubleshooting steps. Begin by verifying the power supply to both the thermostat and your HVAC unit – check breakers and fuses. Double-check all wiring connections at the base plate, ensuring they are secure and correspond correctly to the terminal labels.
The manual emphasizes the critical role of a compatible system. Confirm your HVAC system meets the T6 Pro’s requirements. A missing or improperly connected C-wire is a common culprit; explore the manual’s guidance on C-wire alternatives.
Finally, attempt a system reset via the thermostat’s menu or the Honeywell Home app.

Resources & Support
Find the Honeywell T6 Pro Installation Manual PDF, helpful support websites, FAQs, and warranty details for assistance with your smart thermostat setup.
Downloading the Honeywell T6 Pro Installation Manual PDF
Accessing the official Honeywell T6 Pro Installation Manual PDF is straightforward and provides a comprehensive resource for your installation journey. You can typically find the PDF directly on the Honeywell Home support website. A quick search for “Honeywell T6 Pro Manual PDF” will lead you to the correct download link.
Alternatively, many HVAC retailers who sell the T6 Pro also host the manual on their websites for easy customer access. Ensure you are downloading from a reputable source to avoid potentially compromised files. The PDF contains detailed diagrams, troubleshooting tips, and safety information crucial for a successful and safe installation.
Keep this manual readily available throughout the installation process and for future reference should you need to revisit any steps or address potential issues. It’s a valuable tool for maximizing your T6 Pro’s functionality.
Honeywell Home Support Website
The Honeywell Home support website (honeywellhome.com) is your central hub for all things T6 Pro. Beyond the downloadable installation manual PDF, it offers a wealth of resources, including frequently asked questions, troubleshooting guides, and video tutorials. You’ll find detailed explanations of features, compatibility information, and assistance with connecting your thermostat to your smart home ecosystem.
The website’s search function is incredibly useful for quickly locating specific information related to your installation or operation. You can also access live chat support or submit a support request if you require personalized assistance.
Regularly check the support site for firmware updates and new features that can enhance your T6 Pro’s performance and functionality. It’s a continuously updated resource designed to ensure a seamless user experience.
Frequently Asked Questions (FAQ)
Many common questions regarding the Honeywell T6 Pro installation are addressed in a comprehensive FAQ section, often found alongside the installation manual PDF on the Honeywell Home website. These FAQs cover topics like C-wire requirements, compatibility with different HVAC systems, and troubleshooting common setup issues.
Typical questions include: “What if I don’t have a C-wire?”, “How do I connect to my Wi-Fi network?”, and “Why isn’t my thermostat powering on?”. The FAQ provides concise, step-by-step answers to help you resolve issues quickly.
Before contacting support, reviewing the FAQ is highly recommended. It can save you time and effort by providing immediate solutions to frequently encountered problems during the installation process.
Warranty Information
The Honeywell T6 Pro smart thermostat is backed by a limited warranty, details of which are thoroughly outlined within the official Honeywell T6 Pro Installation Manual PDF. This warranty typically covers defects in materials and workmanship for a specified period, usually one or two years from the date of purchase.
Warranty coverage may vary depending on the region and retailer. It’s crucial to retain your proof of purchase (receipt or invoice) as it’s required for any warranty claims. The manual PDF clearly states what is covered and what is not, including any limitations or exclusions.
For specific warranty terms and conditions, always refer to the official documentation included with your thermostat or download the latest version of the installation manual PDF from the Honeywell Home support website.
Resetting the Honeywell T6 Pro to Factory Defaults
The Honeywell T6 Pro Installation Manual PDF details the process for restoring your thermostat to its original factory settings. This is useful for troubleshooting, preparing the device for a new user, or resolving persistent software issues. Typically, resetting involves navigating through the thermostat’s menu system.
The manual PDF provides step-by-step instructions, often requiring a specific sequence of button presses and confirmations on the touchscreen display. Be aware that a factory reset will erase all your personalized settings, including schedules, Wi-Fi connections, and registered accounts.
Consult the PDF for precise instructions tailored to your specific T6 Pro model. A complete reset ensures a clean slate for re-configuration and optimal performance.
Understanding Error Codes
The Honeywell T6 Pro Installation Manual PDF is crucial for deciphering any error codes displayed on your thermostat. These codes indicate specific issues within the system, ranging from minor connectivity problems to more serious HVAC malfunctions. The manual provides a comprehensive list of these codes, along with detailed explanations of their meaning.
Each error code is linked to a potential solution, guiding you through troubleshooting steps to resolve the issue. Common codes relate to power supply, Wi-Fi connectivity, sensor failures, or communication errors with the HVAC system.
Referencing the PDF avoids unnecessary service calls, empowering you to diagnose and potentially fix problems independently. Always consult a qualified technician for complex issues or if you’re uncomfortable performing repairs.