Sunbeam Iron Model GCBSM 423 Cord Replacement: A Comprehensive Guide
This manual provides a detailed‚ step-by-step approach to restoring your ironing experience‚ addressing common cord damage issues with the Sunbeam GCBSM 423 model.
Various online resources‚ including Smashings Magazine and Techy Targets‚ confirm the feasibility of DIY cord replacement‚ offering confidence in reviving your appliance.
Oxford Magazine’s YouTube archives and Reddit discussions highlight the prevalence of cord failures and the desire for accessible repair solutions for this specific iron.
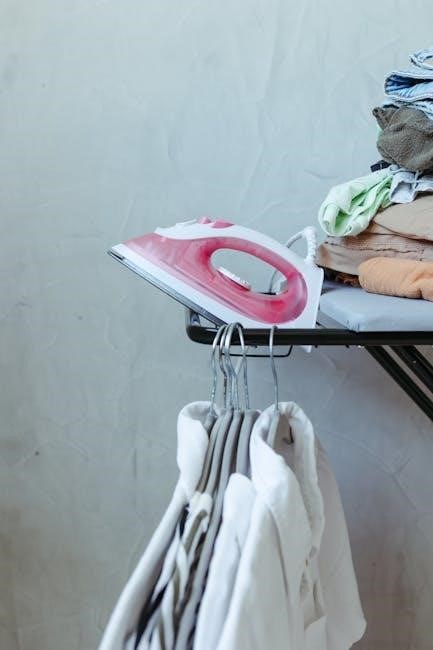
The Sunbeam GCBSM 423 iron is a widely used household appliance‚ known for its reliable performance in smoothing clothes and linens. However‚ like all electrical appliances‚ it can experience wear and tear over time‚ with the power cord being a particularly vulnerable component. A damaged cord doesn’t necessarily mean the end of your iron’s life; often‚ a simple cord replacement can restore it to full functionality.
This guide focuses specifically on the Sunbeam Model GCBSM 423‚ acknowledging the unique aspects of its construction‚ particularly the retractable cord mechanism. Several online resources‚ including manuals and forum discussions‚ indicate a common need for cord replacement in this model. Understanding the iron’s design‚ especially the retraction assembly‚ is crucial for a successful repair.
The information presented here draws from various sources – including guides from Smashings Magazine‚ Techy Targets‚ and Oxford Magazine’s YouTube archives – to provide a comprehensive overview. Reddit discussions also reveal a community seeking solutions for this specific iron‚ highlighting the demand for a clear and concise replacement manual. This guide aims to fulfill that need.

Why Replace the Cord? Common Issues
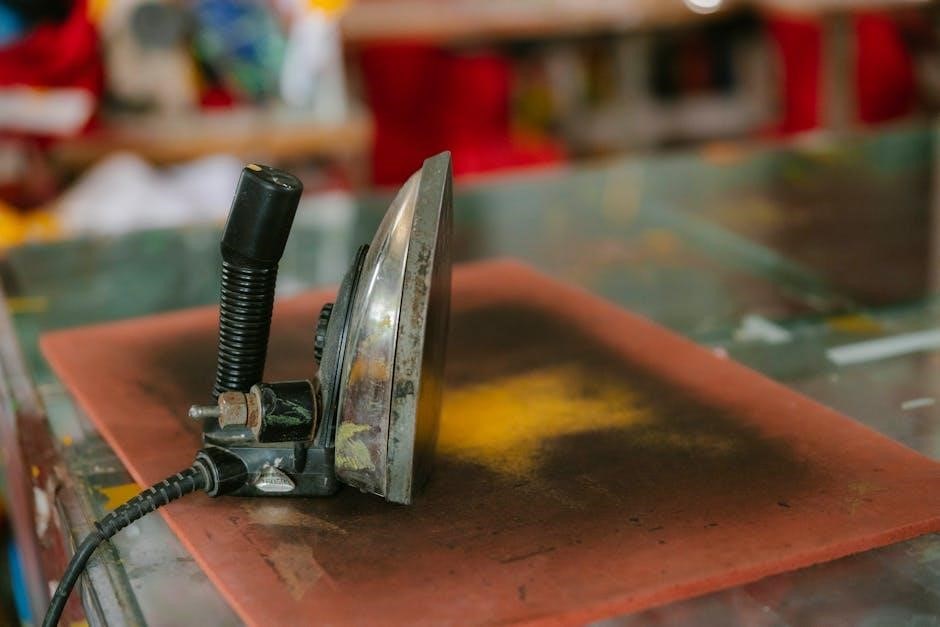
Several issues can necessitate replacing the power cord on your Sunbeam GCBSM 423 iron. The most frequent problem is a frayed or damaged cord‚ often occurring due to repeated bending and flexing during use and storage. This damage poses a significant safety hazard‚ potentially leading to electrical shock or fire.
Online resources‚ like those found on Oxford Magazine and discussions on Reddit‚ consistently identify a failing cord as a primary cause of iron malfunction; Other common symptoms include the iron stopping heating altogether‚ intermittent power delivery‚ or even a burning smell. These signs indicate internal cord damage and require immediate attention.
Furthermore‚ the retractable cord mechanism in the GCBSM 423 can contribute to cord wear. Constant retraction and extension can stress the cord at its entry and exit points. Ignoring these issues not only compromises safety but also prevents effective ironing‚ making cord replacement a practical and cost-effective solution.
Safety Precautions Before Starting
Prioritize safety above all else when undertaking a Sunbeam GCBSM 423 cord replacement. Always unplug the iron from the electrical outlet and ensure it is completely cool before beginning any disassembly. Working with electrical appliances carries inherent risks‚ so caution is paramount.
Never attempt repairs if you are uncomfortable or lack experience with electrical work. If unsure‚ consult a qualified electrician. Inspect the new replacement cord for any pre-existing damage before installation; Avoid working in damp environments‚ as water and electricity are a dangerous combination.
Wear appropriate safety gear‚ including insulated gloves and eye protection. Be mindful of the iron’s internal components and avoid touching any exposed wiring. Double-check all connections after replacement to ensure they are secure and properly insulated‚ preventing potential hazards during future use.

Tools and Materials Needed
Successful cord replacement requires specific tools‚ including screwdrivers‚ wire strippers‚ and electrical tape; A compatible replacement cord is essential‚ alongside a safe workspace for disassembly.
Required Tools for Cord Replacement
To confidently tackle the Sunbeam GCBSM 423 cord replacement‚ gathering the correct tools is paramount. A Phillips head screwdriver is crucial for removing the iron’s base plate and accessing internal screws. You’ll also need a flathead screwdriver‚ potentially for prying or manipulating smaller components during disassembly.
Essential electrical tools include wire strippers for preparing the new cord for connection‚ and electrical tape to securely insulate the connections‚ preventing shorts. A multimeter is highly recommended for testing the new cord’s continuity and ensuring proper functionality post-replacement.
Additionally‚ consider having a small pair of pliers for gripping and maneuvering wires‚ and a magnifying glass to inspect the intricate wiring within the iron. Safety glasses are vital to protect your eyes from any stray wires or debris. Finally‚ a well-lit and organized workspace will significantly streamline the process.
Sourcing a Replacement Cord (Compatibility)
Finding a compatible replacement cord for your Sunbeam GCBSM 423 is critical for a safe and functional repair. The ideal cord should match the original’s gauge (wire thickness) and length to ensure proper electrical performance and prevent overheating. Generic iron cords may work‚ but verifying amperage and voltage ratings is essential.
Online retailers like Amazon and specialized appliance parts suppliers often stock suitable cords. When searching‚ specify “iron cord replacement” and‚ if possible‚ include “Sunbeam” or the model number (GCBSM 423) to narrow the results.
Carefully examine the original cord’s plug to ensure the replacement has the same configuration. Prioritize cords with similar insulation materials and strain relief designs for optimal safety. If unsure‚ consulting an appliance repair professional is advisable to guarantee compatibility and avoid potential hazards.
Disassembly: Accessing the Cord Connection
Begin by carefully removing the iron’s base plate‚ then locate and detach the securing screws of the retraction mechanism‚ as highlighted in online discussions.
Removing the Iron’s Base Plate
The initial step in accessing the cord connection involves carefully detaching the iron’s base plate. This process typically requires locating and unscrewing any visible screws securing the plate to the iron’s body. These screws are usually found on the underside of the iron‚ often near the edges of the base plate.
It’s crucial to exercise caution during this step to avoid damaging the surrounding components or stripping the screw heads. A properly sized screwdriver is essential for a secure grip and to prevent slippage. Once the screws are removed‚ gently lift the base plate‚ being mindful of any hidden clips or connectors that might still be holding it in place.
A slight rocking motion may help to loosen the plate if it feels stuck. Avoid using excessive force‚ as this could potentially break the plastic housing or damage the internal wiring. Once fully detached‚ set the base plate aside in a safe location‚ ensuring that no small parts are lost.
Locating and Removing Securing Screws (Retraction Mechanism)
After removing the base plate‚ the next critical step is identifying and removing the screws that secure the retraction mechanism. According to user inquiries regarding disassembly‚ specifically on Reddit’s r/HelpMeFind‚ there are at least two screws initially visible. These screws are typically located within the area previously covered by the base plate‚ anchoring the retraction assembly to the iron’s main body.
However‚ be aware that there may be additional securing points. The original questioner noted a button on the retractable cord suggesting potential detachment points within the retraction mechanism itself. Carefully inspect the entire assembly for any hidden screws or clips.
Use a screwdriver that precisely fits the screw heads to prevent stripping. Remove the screws slowly and deliberately‚ keeping track of their location for reassembly. Once these screws are removed‚ the retraction assembly should be partially loosened‚ preparing it for further detachment.
Detaching the Retraction Assembly
With the securing screws removed‚ carefully begin detaching the retraction assembly from the iron’s body. Gentle wiggling and lifting are key; avoid forceful pulling‚ which could damage internal components. Remember the initial concern raised on Reddit about a button potentially linked to the retraction mechanism – exercise caution around this area.
Inspect for any remaining clips or connectors that might be holding the assembly in place. These could be hidden beneath wiring or within the assembly’s housing. A visual check from multiple angles is recommended.
Once fully detached‚ the retraction assembly should separate cleanly from the iron. Be mindful of the cord itself as it’s connected to this assembly. Handle the assembly with care‚ avoiding any strain on the cord or its connections. This separation provides access to the cord’s internal connection points for replacement.
Cord Replacement Procedure
Now‚ disconnect the damaged cord and prepare the new one‚ ensuring compatibility with the Sunbeam GCBSM 423. Connect the new cord securely to restore functionality.
Disconnecting the Old Cord
Before commencing‚ ensure the iron is completely unplugged from the power source – safety is paramount. Carefully examine how the original cord is connected within the iron’s housing. Typically‚ the wires are attached to terminals via screws or push-fit connectors.
Document the wiring configuration with a photograph or sketch before disconnecting anything; this will be invaluable during reassembly. Gently loosen any securing screws and carefully detach the wires from the terminals. If push-fit connectors are present‚ use a small screwdriver or specialized tool to release the wires – avoid forceful pulling.
Pay close attention to the color coding of the wires (typically brown/blue/green/yellow) and their corresponding terminal positions. Take note of the retraction mechanism button‚ as mentioned in QA discussions‚ and ensure it isn’t inadvertently disturbed during this process. Once disconnected‚ carefully remove the damaged cord from the iron’s housing‚ noting its routing path for later reference.
Preparing the New Cord for Connection
Verify the new replacement cord’s compatibility with the Sunbeam GCBSM 423 model‚ ensuring it’s appropriately rated for the iron’s power requirements. Carefully strip the outer insulation of the new cord‚ exposing the inner wires. Then‚ strip a small portion of insulation from each individual wire‚ revealing the conductive metal.
Match the wire colors to the original cord’s configuration‚ referencing the documentation created during disconnection. If the new cord’s wire colors differ‚ use a permanent marker to clearly label them for accurate reconnection. Ensure the exposed wire length is sufficient to reach and securely connect to the iron’s terminals‚ but avoid excessive length.
Consider tinning the exposed wire ends with solder to prevent fraying and improve conductivity. This step isn’t essential but can enhance the connection’s reliability. Double-check all preparations before proceeding to the connection stage‚ ensuring a smooth and safe reassembly process.
Connecting the New Cord to the Iron
Carefully insert the prepared wires into the iron’s terminal block‚ ensuring each wire is fully seated and aligned with its corresponding terminal. Refer to the notes and markings made during the old cord’s disconnection to maintain the correct wiring configuration. Secure each wire by tightening the terminal screws firmly‚ but avoid over-tightening‚ which could damage the terminals or wires.
Gently tug on each wire after tightening to confirm a secure connection. A loose connection can cause heating issues or even a fire hazard. Ensure no exposed wire strands are protruding from the terminal block‚ as these could create a short circuit.
Inspect the cord strain relief mechanism‚ ensuring it properly secures the cord where it enters the iron’s housing‚ preventing excessive bending or strain on the connections. A properly secured cord contributes to the longevity and safety of the repair.

Reassembly and Testing
Following cord connection‚ carefully reassemble the iron‚ securing the retraction assembly and base plate. Thorough testing is crucial to confirm functionality and safety.
Verify proper heating and retraction‚ ensuring a smooth and reliable ironing experience after the replacement process is complete.
Reattaching the Retraction Assembly
Carefully align the retraction assembly with the iron’s body‚ ensuring all internal components are correctly positioned. Remember the initial disassembly steps to guide this process‚ particularly concerning the button potentially detaching with the mechanism – avoid forcing it.
Reinsert the securing screws that were previously removed‚ tightening them firmly but not excessively. Over-tightening could damage the plastic housing or strip the screw threads. Double-check that the assembly sits flush against the iron’s base.
Test the retraction mechanism’s movement before fully reassembling. Gently pull and release the cord to confirm smooth operation. If resistance is felt‚ re-examine the assembly for any obstructions or misalignments. A functional retraction is vital for safe and convenient use.
Pay close attention to any clips or locking features that secure the assembly. These are often subtle and easily overlooked‚ but crucial for a secure and lasting repair.
Reinstalling the Base Plate
Begin by carefully aligning the base plate with the iron’s body‚ ensuring all mounting points correspond correctly. Gently press the base plate into position‚ avoiding any forceful movements that could damage the internal components or the plate itself.
Secure the base plate using the original screws‚ tightening them in a criss-cross pattern. This ensures even pressure distribution and prevents warping or misalignment. Do not overtighten‚ as this could crack the plate or strip the screw threads.
Verify the base plate is firmly attached and sits flush against the iron’s body. Check for any gaps or unevenness‚ which could indicate improper installation. A secure base plate is essential for safe and effective ironing.
Inspect the cord’s exit point from the iron to ensure it isn’t pinched or strained. Proper cord routing prevents damage during use and extends the lifespan of the replacement cord.
Testing the Iron After Cord Replacement
Before using the iron on fabric‚ perform a safety check. Plug the iron into a grounded outlet and observe for any sparks‚ smoke‚ or unusual odors – immediately unplug if any occur.
Turn the iron on to its lowest heat setting and allow it to heat up. Monitor the temperature to ensure it reaches the selected level. Verify the temperature control functions correctly‚ cycling through different settings.
Test the steam function‚ if applicable‚ by activating the steam button and observing steam output. Ensure steam is emitted evenly and without leaks. Check the water reservoir for any signs of leakage.
Finally‚ test the retraction mechanism by gently pulling and releasing the cord. Confirm it retracts smoothly and locks securely in both extended and retracted positions. A fully functional retraction system is vital.

Troubleshooting Common Issues
Addressing problems post-replacement is crucial; issues like no heating‚ retraction failures‚ or connection problems may arise‚ requiring careful inspection and potential re-evaluation.
Iron Not Heating After Replacement
If your Sunbeam GCBSM 423 fails to heat after a cord replacement‚ several factors could be at play. First‚ double-check the cord connections within the iron’s housing. Ensure the wires are securely fastened to the terminals‚ and no strands are loose or disconnected. A poor connection prevents electricity from reaching the heating element.
Next‚ inspect the thermal fuse‚ a safety component designed to blow if the iron overheats. A blown fuse will halt heating. Locating and replacing this fuse might require further disassembly‚ but it’s a common culprit. Consider the possibility of a faulty heating element itself‚ though this is less frequent. Testing the element with a multimeter can confirm its functionality.
Finally‚ verify the thermostat is operating correctly. It regulates temperature‚ and a malfunction can prevent heating. Remember safety first – always disconnect the iron before any internal inspection. If you’re uncomfortable with electrical work‚ consult a qualified appliance repair technician.
Retraction Mechanism Not Working
If the cord retraction isn’t functioning on your Sunbeam GCBSM 423 after replacement‚ carefully examine the retraction assembly. Recall the initial disassembly – ensure all components were reattached correctly‚ particularly the spring and any locking mechanisms. The single button mentioned in user queries regarding disassembly could be a key component.
Check for obstructions within the retraction channel. Debris or a kink in the new cord can impede movement. Lubricate the mechanism with a small amount of silicone-based lubricant‚ avoiding oil-based products that attract dust. Verify the spring tension is adequate; a weak spring won’t provide sufficient retraction force.
Inspect the connection point between the cord and the retraction mechanism. A loose or improperly seated cord can prevent smooth operation. If the issue persists‚ revisit the assembly steps‚ paying close attention to the alignment of parts. Consider seeking professional assistance if you’re unsure about the internal workings.
Cord Connection Issues
Experiencing problems with the cord connection after replacement on your Sunbeam GCBSM 423? First‚ ensure the new cord is securely fastened to the iron’s terminals. A loose connection is a common culprit‚ preventing power from reaching the heating element. Double-check the polarity – incorrect wiring can cause malfunctions or safety hazards.
Inspect the terminals themselves for corrosion or damage. Clean them with a small wire brush or contact cleaner if necessary. Verify the wires are making firm contact with the terminals‚ and that no strands are loose or exposed. Ensure the strain relief is properly positioned to prevent the wires from being pulled or stressed.
If the connection still fails‚ carefully examine the cord for any internal breaks or damage sustained during installation. A faulty cord‚ even new‚ can cause intermittent or complete power loss. Consider professional help if you’re uncomfortable working with electrical connections.
Preventative Maintenance
Regular cord care and inspection are vital for longevity. Avoid wrapping the cord tightly around the iron‚ and store it loosely to prevent damage and ensure safety.
Consistent checks for wear and tear‚ like fraying or cracks‚ will help identify potential issues before they escalate‚ maintaining optimal ironing performance.
Cord Care and Storage
Proper cord handling is paramount to extending the life of your Sunbeam GCBSM 423 iron and preventing future replacements. Avoid the common mistake of tightly wrapping the power cord around the base of the iron after each use; this creates significant stress points and accelerates wear and tear on the wires within.
Instead‚ opt for a loose coiling method‚ creating larger loops that minimize bending and kinking. Store the iron in a dry location‚ away from extreme temperatures or humidity‚ which can degrade the cord’s insulation over time. Never store the iron with the cord draped over sharp edges or corners‚ as this can cause cuts or abrasions.
Consider utilizing a dedicated cord wrap or organizer to keep the cord neatly contained and protected during storage. Regularly inspect the cord for any signs of damage‚ such as fraying‚ cracking‚ or exposed wires‚ even if you haven’t noticed any functional issues. A proactive approach to cord care will save you time‚ money‚ and the inconvenience of a malfunctioning iron.
Regular Inspection for Wear and Tear
Consistent visual checks are crucial for maintaining the safety and functionality of your Sunbeam GCBSM 423 iron. Before each use‚ carefully examine the entire length of the power cord‚ paying close attention to areas near the iron itself and the plug. Look for any signs of fraying‚ cracking‚ or exposed wiring – these are immediate indicators of potential hazards.
Gently flex the cord along its length to identify any stiff or brittle sections‚ which may suggest internal damage. Also‚ inspect the plug for loose connections or damage to the prongs. If you notice any of these issues‚ discontinue use immediately and consider cord replacement.
Don’t ignore minor imperfections; they can quickly escalate into more serious problems. Remember that a damaged cord poses a risk of electric shock or fire. Proactive inspection‚ combined with proper cord care‚ is the best defense against unexpected iron failures and ensures a safe ironing experience.